Project - 7 :- Clap Switch By Using Arduino


                                    PROJECT – CLAP SWITCH

In this tutorial you will learn how to use a Sound Sensor with Arduino and glowing a LED and beeping a Buzzer by Clapping.

                                                     STEP – 1: Components

Components Required:-
1.    Arduino Uno.
2.    Breadboard.
3.    Sound Sensor.
4.    LED
5.    Buzzer
6.    Wires         

                                       STEP – 2: Circuit

Clap Switch Output By Using Arduino
The connections are pretty easy, see the image above with the breadboard circuit schematic.


.                                              

                                       STEP – 3: Upload Code

int LED = 4;   //LED connected to pin 4
int micPin = 2;   // Mic connected to pin 2
int micVal = HIGH;      //HIGH is no sound, LOW is sound
boolean pwrToggle = true;
void setup ()
{
  Serial.begin(9600); 
  pinMode(LED, OUTPUT);  //Set pin for output
    digitalWrite(LED, HIGH);  // HIGH is off, LOW is on
  pinMode (micPin, INPUT) ;   //Set pin for input
}
void loop ()
{
  micVal = digitalRead (micPin) ; // Listen...
 
  if (micVal == LOW) // Hear something!!!
  {
      if (pwrToggle == true) {      //relay off (true) Turn it on and display message in serial Monitor
            Serial.println ("LED off");
            digitalWrite(LED, LOW);
            pwrToggle = false;
            delay (500);
      } else {    //relay on (true) Turn it off and display message in serial Monitor
            Serial.println ("LED on");
            digitalWrite(LED, HIGH);
            pwrToggle = true;
            delay (500);
      }
  }
}

      /* Copy above Code and Paste in Your Arduino Sketch */

                               Step 4: Well Done!
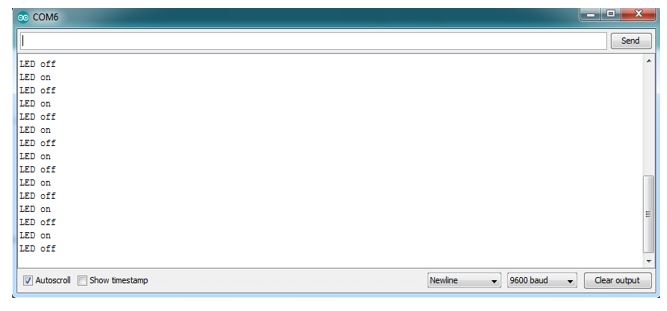
Clap Switch Output
You have successfully completed one Arduino Project and you learned how to use a Sound Sensor with Arduino and also learned how to on and off LED by Clapping.


               THANKYOU!


Comments

Popular posts from this blog

Project - 14 :- Traffic Light Using By Arduino

                                PROJECT – Traffic Light                        In this tutorial you will learn how to make Traffic Light with Arduino.                                                     STEP – 1 Components Components Required:- 1.     Arduino Uno 2.     Breadboard 3.     3  LED 4.     7 Segment 5.     3x 220Ohm resistors,1 1KOhm Wires .                                    ...

Project - 13 :- LED MATRIX By Using Arduino

                                PROJECT – LED MATRIX In this tutorial you will learn how to use LCD with Arduino and display some text on the LCD.                                                     STEP – 1 Components Components Required:- 1.      Arduino Uno 2.      Breadboard 3.      LED MATRIX 4.      Wires.                                          STEP – 2: Circuit The connections are pretty easy, see the image above with the b...